
What specific installation techniques are essential for ensuring the optimal stability and alignment of a cantilever rack system?
Essential techniques include accurately surveying and setting out the base, levelling and anchoring each upright to the specified torque, fitting braces and arms correctly, and checking that the structure is plumb and square. A final inspection should confirm anchor security, arm alignment, load ratings and clearances against the manufacturer’s instructions before the system is put into service.
Optimal stability and alignment in a cantilever rack system depend on accurate setting out, a suitable supporting slab, correctly installed anchors, properly fitted bracing and arms, and systematic checks before loading. Each stage must follow the manufacturer’s installation instructions, the approved layout and the specified load capacity.
Survey the installation area first. Confirm the available space, aisle arrangements, access routes, floor condition and any obstructions before positioning components. The supporting slab must be capable of carrying the imposed loads from the uprights and stored materials. Check for cracks, joints, damaged areas, changes in level and services beneath the proposed anchor positions. Any concern about the floor or the proposed layout should be referred to the responsible designer or structural specialist before work begins.
Set out the base accurately. Mark the centre lines and upright positions from a controlled datum rather than measuring independently from walls or other structures. This prevents small errors from accumulating along the installation. Check bay spacing, row straightness, aisle clearances and end offsets against the approved drawing. Avoid assuming that warehouse walls or floor joints are square; verify the actual conditions on site.
Position and level each upright. Assemble the base and upright components in the sequence specified by the manufacturer, keeping fixings sufficiently loose for initial adjustment where appropriate. Use suitable levelling equipment to check each upright in both directions. Level the base plates with approved shims or packers where permitted, ensuring that they are stable, correctly sized and fully supported. Do not use improvised materials or packers that could crush, move or interfere with the anchor installation.
Install anchors correctly. Drill anchor holes to the required diameter and depth, keeping them clear of dust and debris before inserting the specified anchors. Follow the manufacturer’s requirements for edge distances, embedment, tightening sequence and curing or setting time where applicable. Tighten fixings using a calibrated torque wrench and record the results when the project procedure requires it. Under-tightening can reduce restraint, while over-tightening can damage the anchor or base connection.
Fit bracing and structural connections in the correct order. Braces, tie members and connection plates maintain the geometry of the system and help transfer forces between the uprights. Make sure every member is installed in the correct orientation and that all bolts, washers, locking devices and connection components are present. Do not force misaligned holes together or leave connections partially tightened while the structure is treated as complete. After the frame has been adjusted, tighten connections in accordance with the specified sequence.
Install arms and supports evenly. Fit each arm at the designated level and secure it with the correct locking arrangement. Check that arms on opposing sides are at matching heights and that their seating points are fully engaged. Confirm that arm length, stop features and any end restraints match the intended load type. Arms should not be altered, drilled or substituted without written approval from the system designer or manufacturer.
Check plumb, square and straightness progressively. Do not wait until the entire installation is complete to identify movement or misalignment. Recheck the uprights after bracing has been fitted and again after anchors and connections have been fully tightened. Use a suitable level, laser or other calibrated checking method to verify that uprights are plumb, bays remain square and rows are straight. Correct deviations within the manufacturer’s stated tolerances before proceeding; do not disguise them by forcing arms or braces into position.
Control the installation sequence and temporary stability. Partially assembled frames may be unstable, particularly before bracing and anchoring are complete. Restrict access to the work area, protect incomplete structures from impact and use temporary support where required by the method statement. Components should be lifted and handled using equipment suitable for their weight and shape. Keep people clear of suspended loads and do not permit materials to be placed on the system before the installation has been signed off.
Complete a documented final inspection. The inspection should confirm that:
- the layout, bay spacing, aisle widths and clearances match the approved design;
- the floor, base plates, shims and anchors are suitable and secure;
- uprights are plumb, rows are straight and frames are square within the specified tolerances;
- braces, bolts, washers, locking devices and other connections are correctly fitted;
- arms are level, fully seated and protected against unintended dislodgement;
- load notices and identification markings are visible and accurate;
- there is no damage, distortion, sharp edge or obstruction that could affect safe use; and
- the completed system has been checked against the manufacturer’s instructions and design documentation.
Resolve any defect before the cantilever rack system is released for use. Keep installation records, torque records, inspection findings and any approved alterations with the site documentation. Once operational, users should load materials evenly, stay within the stated capacity and report impact damage or movement immediately. A competent post-installation inspection provides an additional check that the completed system is stable, aligned and suitable for the intended warehouse operation.
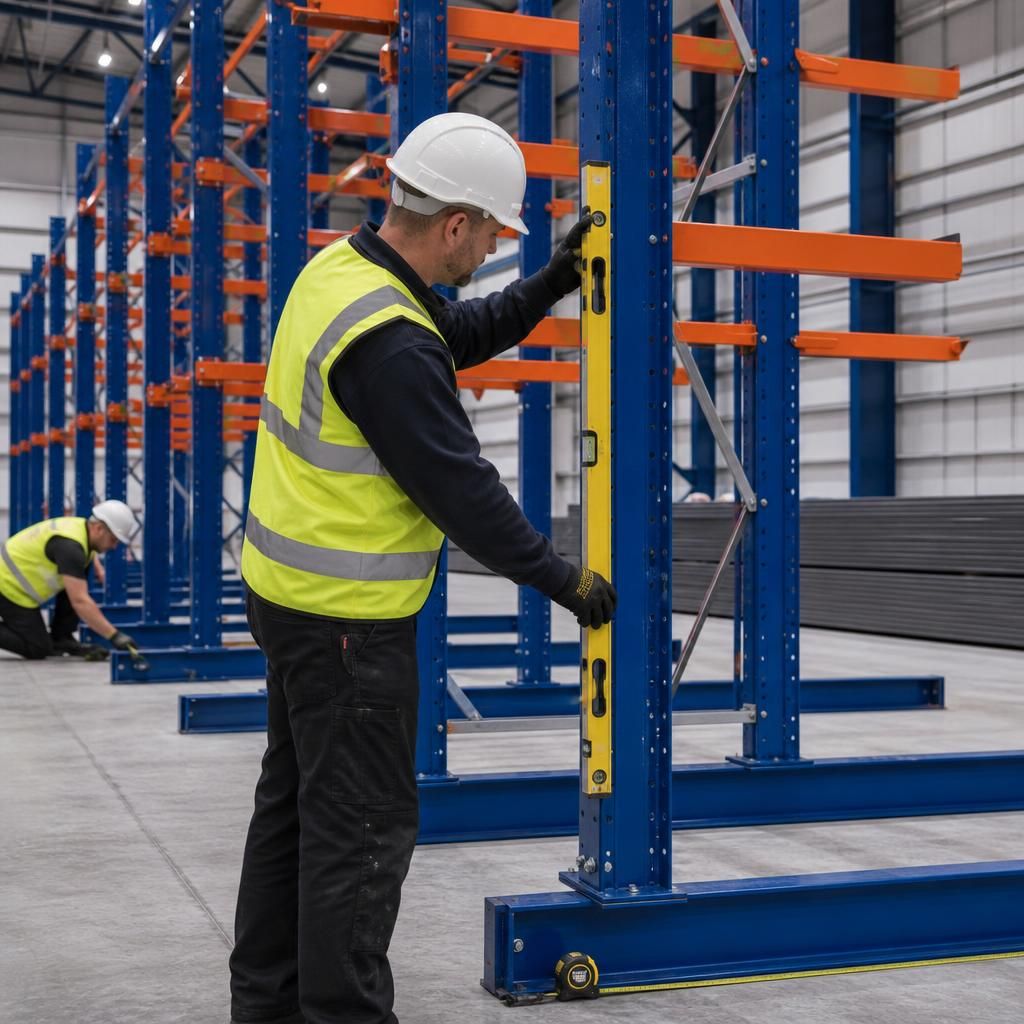
Progressive alignment checks are essential to keeping a cantilever rack system stable during installation. Check each upright for plumb in both directions, confirm that the bases are level, and verify that the row remains straight before fully tightening the anchors and structural connections.
Recheck the system after bracing and arms have been fitted, as tightening or adding components can reveal movement or introduce minor misalignment. Use suitable calibrated measuring equipment and correct any deviation within the manufacturer’s specified tolerances. Do not force arms or braces into position to compensate for an inaccurately set-out upright; resolve the underlying issue before the system is loaded.
Book Cantilever Rack Installation Training
Book Cantilever Rack Installation Training with Able Racking to reinforce correct setting-out, anchoring and alignment procedures. Contact our team to discuss your training requirements.